Thursday, June 28, 2012

Baby Die-cut

Hi Everyone, I just wanted to share a die-cut that I made today
Every month over at Erica's Craft Room Swaps
on facebook. We make cricut die-cuts & or cards. It's alot of fun!
we send 8 of each to Ms Doris & then she sends
us 8 different cards or die-cuts or less depending
on how many people sign up. This month we could make
a baby cricut die-cut. And here is mine!


I cut her out using Baby Steps at 4"
I inked the cheeks and the diaper.
Then I added some liquid pearls & Stickles
on the flower & the diaper I added Fruit
Punch stickles. The headband & center of the
flower I added Petal Pink Liquid Pearls
Fianlly I added White opal liquid Pearls
to the baby's eyes! All of the Items I used can be
purchased at Erica's Room Store
Please see her blinkie on the Left Top!

Thanks for stopping by.

Tuesday, June 26, 2012

Card Making Tuesday


Hi Everyone Welcome!
Today I wanted to show a card I made.
For Card Creating Tuesday Over at My
Cricut Craft Room.

I used Paisley Cachemire to make my flower.
I had a few of the flowers already pre made
I starting making a few of each Die cut that I have
been cutting on my Cricut. That way I would have them
when I needed them. After I cut them out I put them in
a small clear bag and place them on my peg board
or my spin rack so I can find them easy.


I inked the green flower with some chaulk ink
then I added the different colors gems.
Next I stamped Thinking of You using brilliance inks
that I got from Erica. Please visit her store for great deals
and everything that you need to make your projects Shine!


After I did that I added some twine around the stripes.
Which I also got from Erica. I really like the twine!
I was not sure on how to glue down the twine so I
used a liquid glue pen. It worked out great. Just a little messy
but not bad. Here is the finished Card I hope you like it.
Thanks so much for visiting me today!
For more great Cards!!!

Monday, June 18, 2012

Letter of the Day "Y"


Hi Everyone, Welcome to the Letter of the day
over at My Cricut Craftroom. Today
I made a baby page for a book that
I am making for a co-worker.
The name of my page is Yum-Yum.
I had to rack my brain for that one!
I used Baby Steps cartridge of my page. This is
A really cute cartridge You can buy it here:
from Erica. She has it at a really good price!


The yum yum was cut out at 3.5" I layered it & used
foam in between the layers.
Then I added some photo mats & some glittered
flowers around them.

Next I added a jurnal block. So mommy to be can
Write about her baby girl.
On the 2nd page I cut out the bowl & fork at 2.5"
Then again I added photo mats & the jonural block
Thanks so much for stopping by & please head over to
To find more projects like mine today!


Friday, June 15, 2012

scrapbook Friday


Hello everyone & welcome to
Scrapbook Friday
Today over at My Cricut Craft Room
we are making scrapbook Pages
with cars, Trucks, or bikes

So I wanted to make a page for my daughter
that she could give to her father on father's day
I used father's day cartridge to cut out the Super Dad
& I also used it to cut out the car.
I wanted to use something neutral and vintage looking

Here is the car I cut it out of paper that had
a few different colors to it (it was Halloween paper)
then I  cut the outline out in black.
The Super is the negative from the 
Super Dad. The super dad I used some shimmer paper
Just to make it pop a little
For the photo mats I just used some different
colors of brown and inked the edges.


I hope that I have inspired you and hope that
you will head over to the link below
to check out some more projects like this.


Erica's Craft Room Challenges

Friday, June 8, 2012

Scrapbook Friday School Theme

HI Everyone,


Today over at My Cricut Craft Room
We are making scrapbook pages that are school themed.
I wanted to show you a page that I made of my daughter
this is her 3rd grade school picture.


I made the 3rd Grade using CCR Cricut Font & Basic Shapes
I cut them at 2.5" I used foam in between the pink & green layer
I also inked the pink letters using Brilliance Orchid
I then used Simply Charmed to cut out the scissors, and
glue bottle I cut them in the CCR at 3"


In the envelope I have my daughter right at small note
about the 3rd grade I have done this with the 2nd grade as well.
I wanted a little something written by her of what she thinks
of the grade she is leaving behind! I can not believe that
my baby is going into the 4th grade already :(

I hope that you have enjoyed my project and please go over
and check out the Design teams other projects.
Thanks & have a great day!

Erica's Craft Room Challenges

Saturday, June 2, 2012

June's 100 Cricut Cartridges Blog Hop


Hello & welcome to June's 100 Cricut Cartridge Blog Hop
If you came on over from Sarah's blog your in the Right spot.
I hope you are enjoying our hop so far!
For today's hop I made 3 different projects.
The first one is....................

A Father's Day card that I made using the
Father's Day Cartridge!
This is a 5x7 card
I cut the background paper at 4.5 x 6.5
Then I cut out the Happy Father's Day at 3"
Layered it using foam squares.
Then I cut out the boat also layered with foam
I cut the boat at 4"
And for a little extra I but the boat on the black square
Using a wobble. So it looks like the boat is really moving.
 These are so much fun to use
These were a gift from
The Scrapbooking Queen
Thanks!!!


For my next project I made some Wedding Invitations
I am not sure why But I have been wanting to make some.
And since I didn't have anyone to make them for
I had a little fun & made this one for my daughter
who is a Twilight  Fan!
First I cut a black piece of shimmer paper,
then I cut a piece of wedding themed paper,
and inked the edges using my Brilliance ink
that I got over at Erica's Craft Room Store.
She really has everything you need, and great deals!
Here is a link to her store. Please stop by.

OK back to the invite
I used the Divine Wedding Cartridge to make the
I Thee Wed. I layered it using White shimmer paper
I printed the the invite on the computer
onto white shimmer paper.Then I stamped the top,
Used some foam squares on the I Tee Wed, and
of course used some gems to blink it up! 
Here is a close up!

And one more!
Here is a pic of one that I done for my Daughter's Friend
I made here a page so she can hang it in her room.


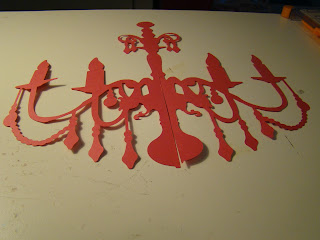
For my Final Project and my Favorite.

This is from Summer In Paris Cartridge.
This is the first piece. Cut using black shimmer paper.
Next I cut the second piece
After I made my cuts I then really added lots of Blink!
I used different gems and glitter glue around the flames
of the candles.
I done this to both sides
Next was the hard part trying to get it to stay together.
I had to tape the sides to get them to stay.
This was not easy had to have my daughter
hold it together while I taped it. 
But it was all worth it  in the end
I love the way it turned out.
Here is it hanging in my doorway.
I hope you enjoyed all
of my projects today. As well as all of the Design Team.
Remember to check back tomorrow 4 more great Projects!
Please go to Mary next
Here is the line up in case you get lost!